
Your First Buy
From Sign-Up to Your First Filled Trade: Seven Steps, and What to Check at Each
Sign-up, security setup, verification, deposit, first trade, checking the fee — and finally getting the money back out. Step seven is the one beginners skip and shouldn't.
This page walks the whole path once — sign-up, first filled trade, and getting the money back out — and tells you what to look for at each step.
Before you start, make sure you have read three questions to answer before you open an account. That page decides whether to start. This one is how.
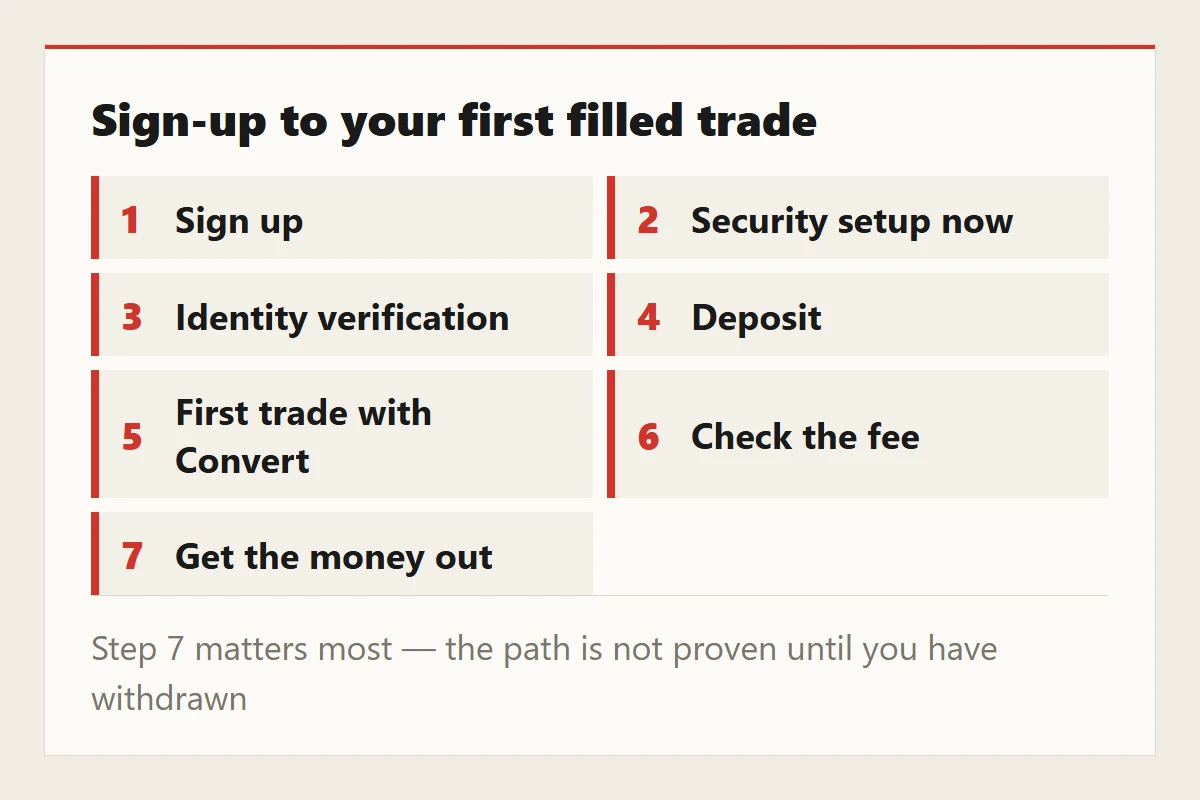
Figure: compiled by this site. The numbers match the sections below; the live rates on the platform are what actually apply.
Step 1: Sign up
Enter only from your own bookmark. Not a link someone sent you, not a search ad. That rule is covered properly in red flags, so it is not repeated here.
Use an email address dedicated to exchanges. Then any "exchange" email that turns up in your everyday inbox is instantly identifiable as fake.
A sign-up link you have checked yourself
Which link you enter through decides whether a referral code travels with you — and whether you land on a lookalike site at all. Before you type anything, read the address bar: it has to say binance.com.
This site is an independent Binance affiliate partner, not the official Binance site, and the code we use is BN6321: https://www.binance.com/join?ref=BN6321. Register through it and we receive a share of the fees the platform pays — it adds nothing to your cost. Whatever discount the sign-up page itself displays is the real number; ignore any absolute "save X% just by registering" claim, ours included.
Step 2: Do the security setup immediately, not later
Do not rush to deposit. Configure these three first:
- Use an authenticator app for 2FA, not SMS. SMS can be hijacked.
- Write the backup key on paper. Setting up the authenticator gives you a backup key. Paper, stored somewhere safe — not a screenshot in your photo library, or you lose both with the phone.
- Set an anti-phishing code. Once set, every genuine email from the platform carries it. An email without the code is fake — the cheapest authenticity check there is.
While you are there, turn on the withdrawal whitelist: withdrawals can then only go to addresses you added in advance. It is one extra step, and it is the step that saves you if the account is ever compromised.
Step 3: Identity verification
Have an unexpired ID ready. An expired document is the single most common place beginners get stuck — checking the date first saves you days of waiting.
Photograph and upload as prompted. Results usually take minutes to hours. Until this clears, a lot of functionality stays locked.
Step 4: Deposit
Funding options differ by region, so treat what your own account displays as the authority. Routes vary a lot in cost and arrival time — read the fee on the one you pick before confirming.
Do not move a large amount first. Send something you genuinely do not care about. The point is to prove the rail works, not to start investing.
Step 5: Make the first trade with Convert
For a first trade, use Convert rather than the spot trading screen.
Convert has three fields: what you are spending, what you want, how much. No order book, no candles, no resting orders to cancel. The smallest possible surface for a mistake.
Leave the Spot interface until you are comfortable. By then you will want to understand limit versus market orders, which is a separate topic.
Step 6: Go and check the fee right away
Once it fills, the first thing to do is pull that trade up in your trade history and see what was actually deducted.
Compare: the base spot fee is 0.1%, or 0.075% if you enabled the BNB discount. Check whether the number you see reconciles.
This is not busywork. People who can check their own books are much harder to sell a "low fee" story to. Full breakdown: what a single spot trade actually costs.
Step 7: Get the money back out (the step that matters most)
This is the step most beginners skip, and the one they should skip least.
While you still only have a small amount in, run the whole withdrawal path once: request it, clear the verification, confirm it arrived.
Why it matters: plenty of people test the deposit and never test the withdrawal. They find the blocker only when they actually need the money — maybe a verification tier is too low, maybe that withdrawal method is unavailable where they are. By then the amount is larger and the pressure is entirely different.
If you are withdrawing to an on-chain wallet, check two things before confirming: the address and the network. Get either wrong and the funds are effectively gone; no support desk can reverse it. The withdrawal screen shows the network fee before you confirm — read that number first.
Once you have done all seven
If all seven steps went smoothly, you now know three things: money gets in, you can read the interface, and money gets out.
Only once those are confirmed have you really "opened an account". Before that, the balance is just a number on a screen.
Fee data checked 2026-08-27 against Binance's official fee schedule. Interfaces and available options change by region and version — trust what the platform displays. Not investment advice.